
The system for adjusting the height of the saw blade on a Electra Beckum / Metabo PKF255 is made by a steel bolt, the feed spindle, pulling a brass nut, the draw bolt. I have also been told that the PKF300 is using the same mechanism, so this description should aso be useabe for this model.
The use of a steel bolt and a brass nut means that if the mechanism gets stuck and one still tries to adjust the height, the feed spindle will ultimately destroy the draw bolt. If the draw bolt also was steel, it would be more difficult to damage, but the system could get stuck and be very difficult to dismantle or the feed spindle could be destroyed.
The part to be replaced is the one marked as “236” in the image below (towards the top rigth). All numbers in quotes in this article refers to that image.
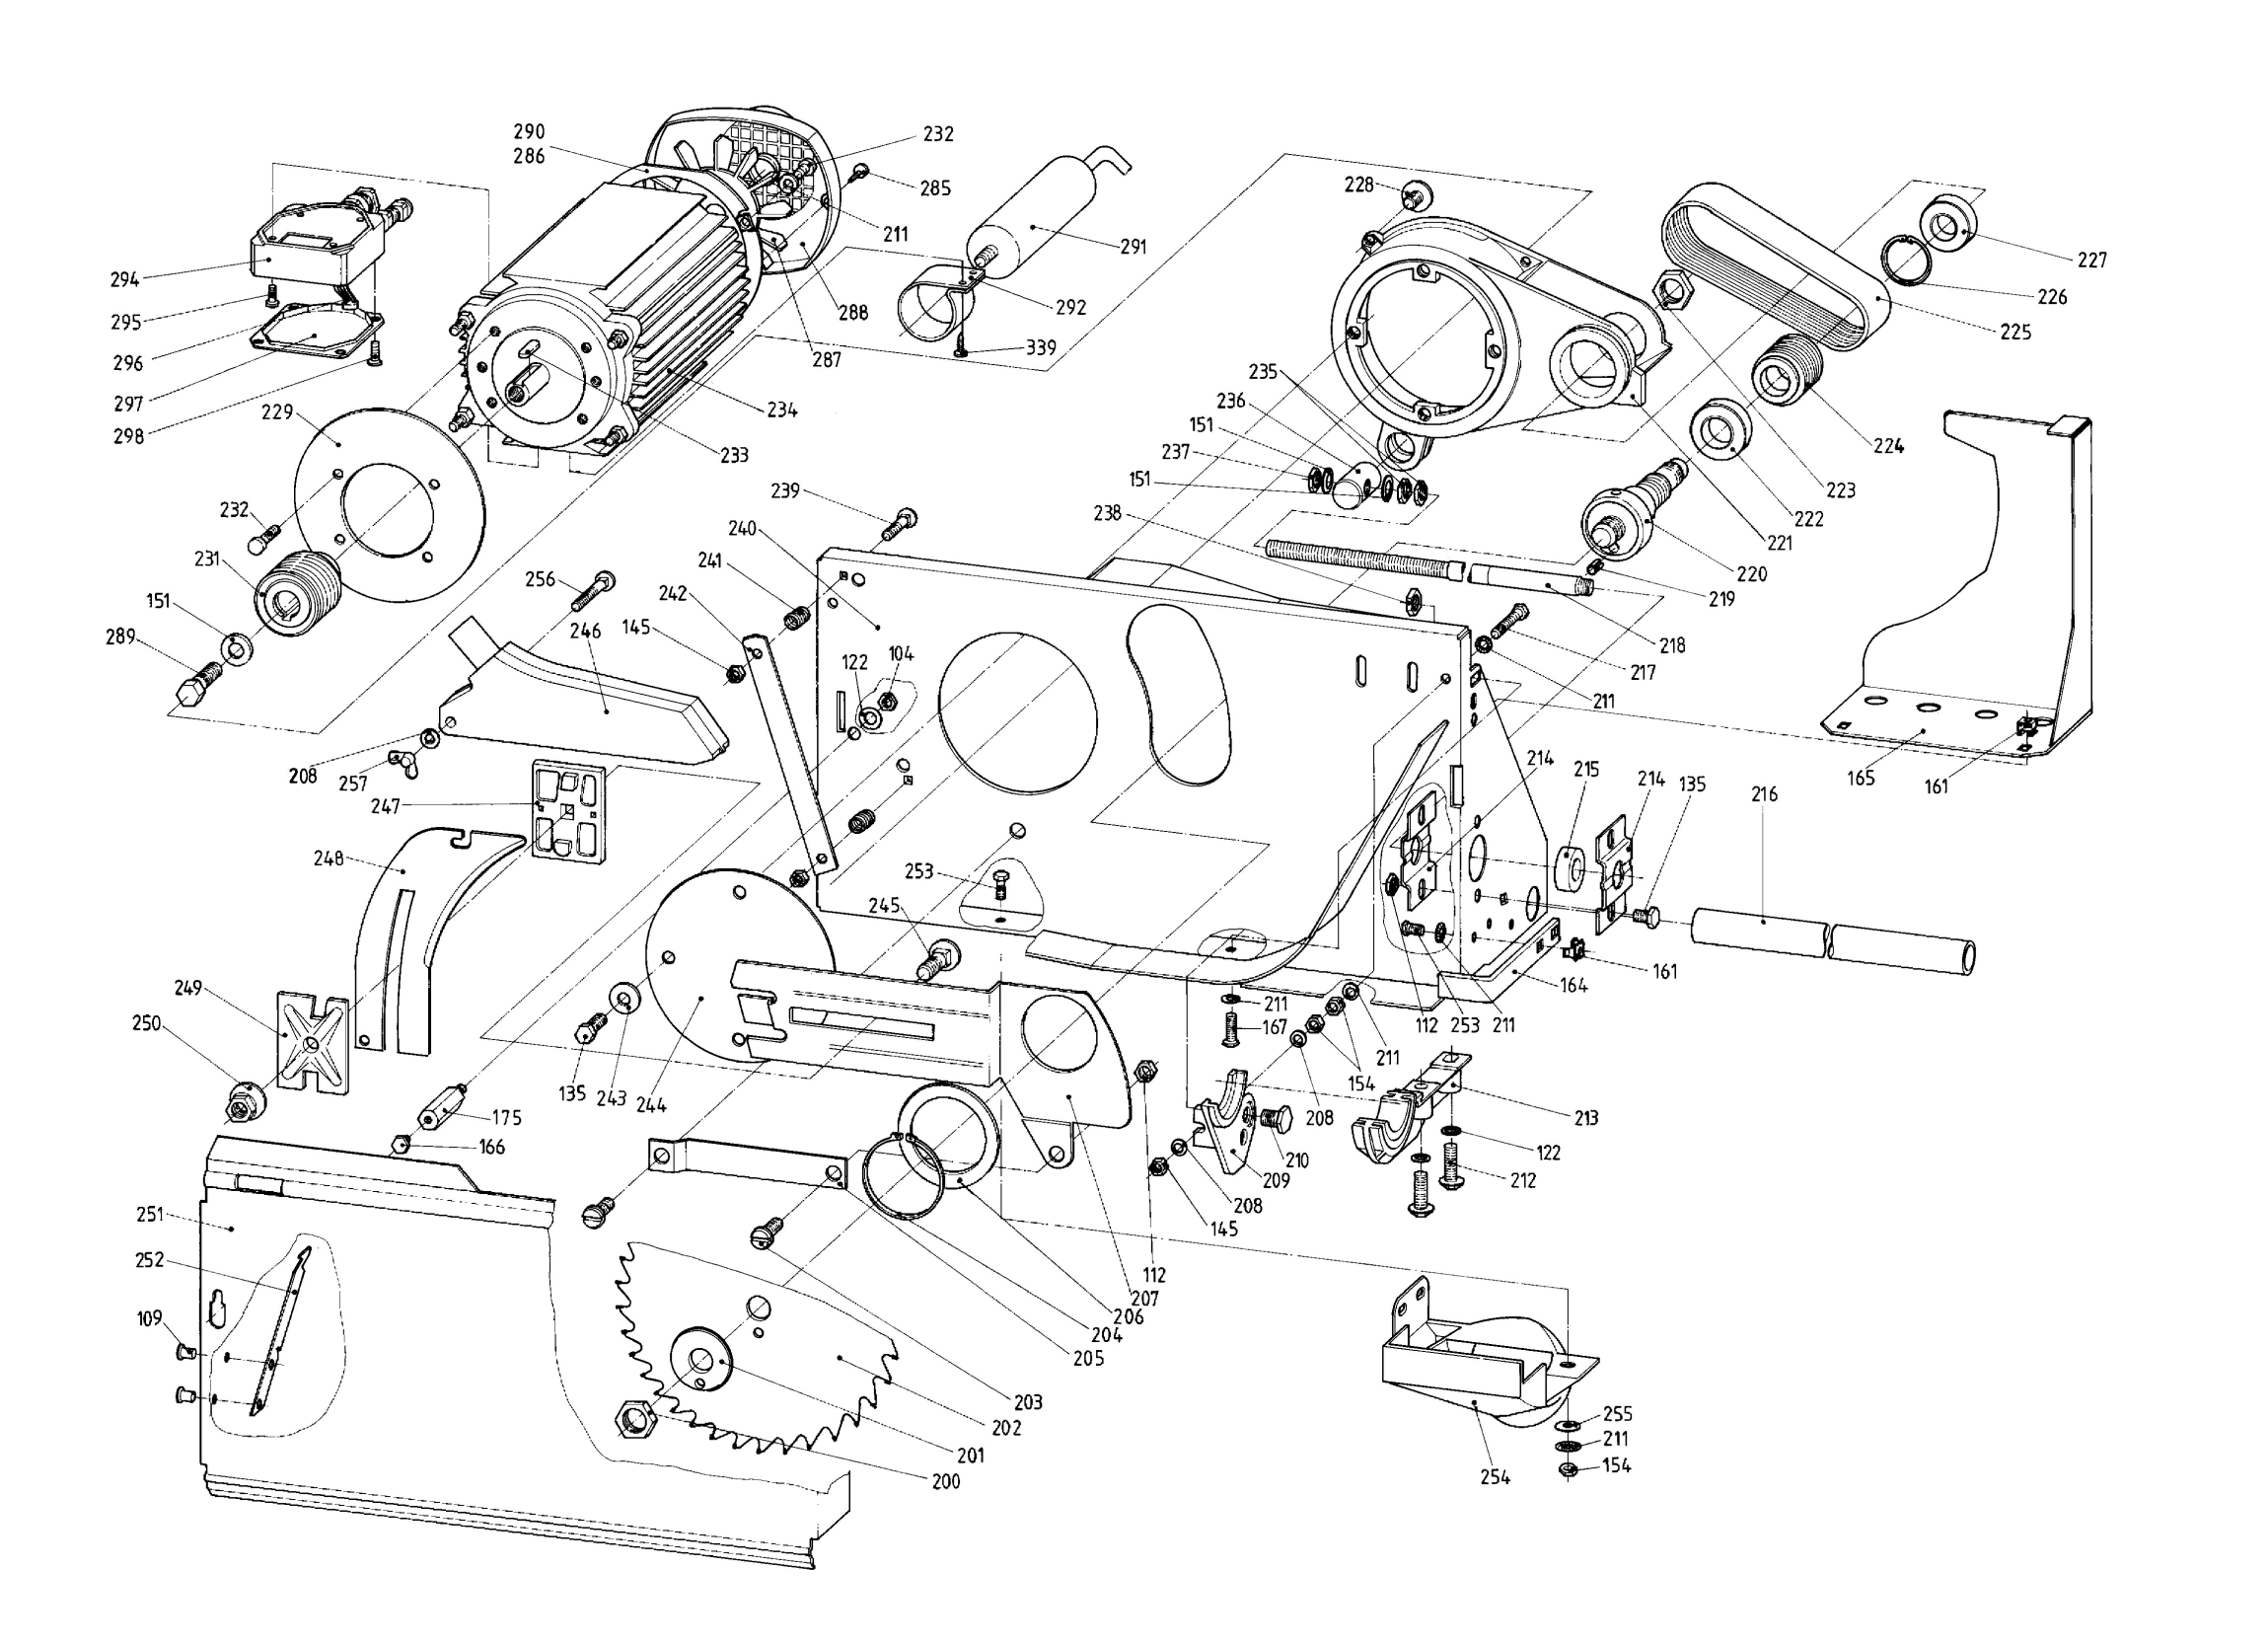
I found a new draw bolt at WMV-Dresden Ersatzteil-Shop, but it should not be too difficult to make it from a 25mm ø brass rod by drilling a hole to make M12 tread. I had to use the spare part list at powertoolspares.com to identify the part numbers. Although, at that shop, the part was not available. The part numbers are also listed in the part manual that should have been delivered with the saw.
The first step is to take the upper part of the saw off the base. It is fastened by 4 screws, one in each corner. They can be reached through the “doors” on the front- and backside of the base. When it is loosened, lift the upper part and put it upside down on the base. Just for warning, it is not possible to get where it is needed to do this repair by removing the top plate of the saw, I first thought that would be the way…
When the underside is available, the first ting to remove is the cover seen on the right of the drawing marked “165”. It is fastend using two screws with nuts fastened in the cover. With this cover removed, the components for height adjustmets are clearly visible.
To be able to remove the pull bolt, the feed spindle “218” must be completely withdrawn from it. This may be easier to do if the saw is in the lowest possition. The height can be adjusted up by using a piece of wood wedged towards an edge on the chip case as seen in the photo. To adjust it down, use a wood mallet just on the other side of where the piece of wood is pushing.
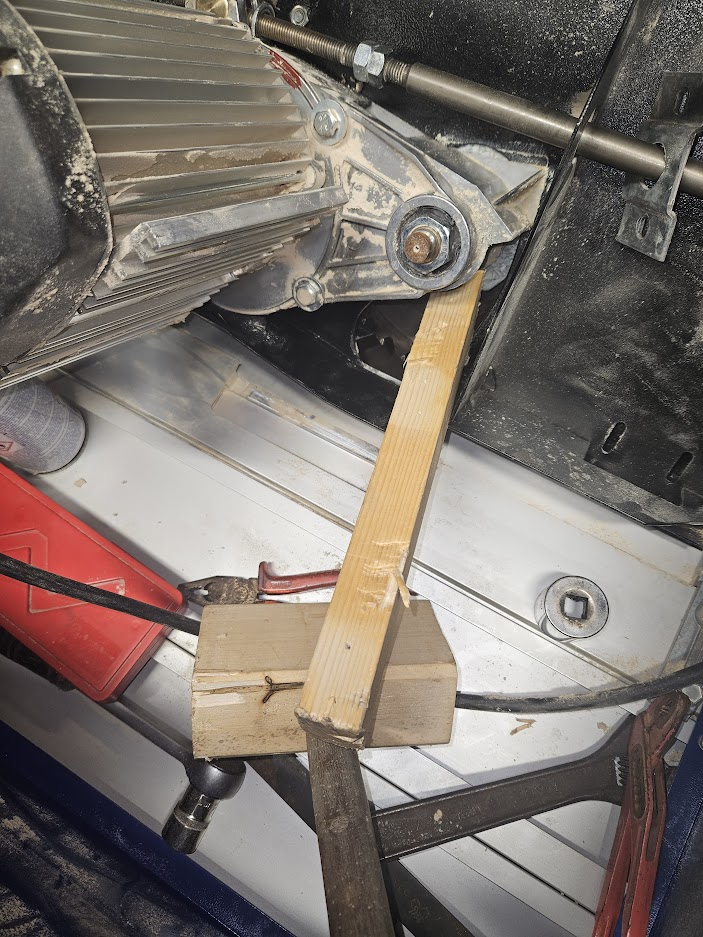
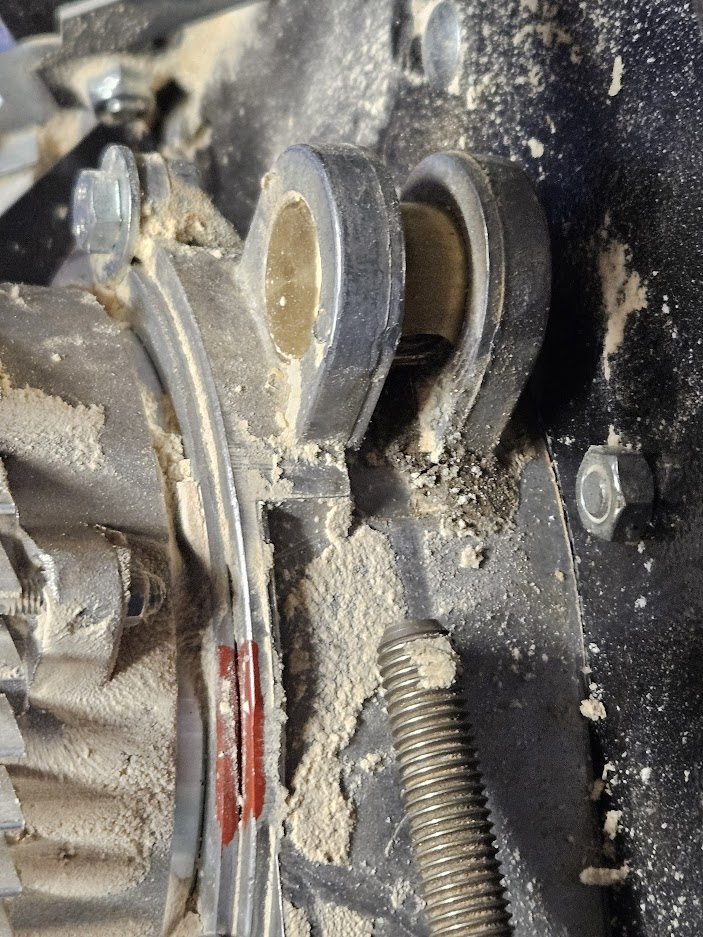
Remove the nut from the inner end of the feed spindle. Thereafter, loosen the two brackes “214” fastening the bearing on the feed spindle to the chip case. Then it is time to remove the handle. Remove the nut and then yank the handle off. It is just pushed onto the spindle. If it does not move, try to wedge it off with a piece of wood. When the handle is off, the small part locking it onto the spindle must be removed, the half moon shaped part seen in the photo.

This part is just fitting very snugly into the spindle, so it can be pulled out with a pair of pliers. Then the tube on the spindle holding the bearing in place is easy to take out.
To remove the bearing, the outer bracket needs to be removed. To do this, screw the spindle so far into the drawbolt that the bracket can be removed inside the casing.
Again, the bearing is sitting tight on the spindle, but it can be removed by the help of a wooden mallet. It is sitting on a “step” on the spindle where it fits tight, when it is pushed its own length towards the handle end, it can easily be removed. Again, the spindle has to be screwed so far into the pull bolt that the bearing fits between the end of the spindle and the inside of the casing.
With the bearing removed, the spindle can be removed completely from the draw bolt.
The draw bolt is also fitting wery tight, I found a hex key to be usable as a wedge to get it out.
An important step now will be to rinse and lubricate the suspention for the saw so that the load on the new draw bolt will be less. Also, as soon as the height adjustment starts to become difficult, it should be rinsed and lubricated to avoid the draw bolt to be damaged again. I sprayed in some wd40 between the flange and the chip case and dried off whatever came out, I am still not sure if this is the right stuff to use, but the mechanism is moving a lot easier than what it used to do.
Notes from the reassembly
The drawbolt it self fits really tight. I had again to use the mallet to get it in. When it was in, it was difficult to turn it to have the right angle to engage with the spindle drive. I had to use a long M12 bolt to turn it into the right position, seeing that the bolt was parallell to the spindle.
The “halfmoon” that is locking the handle onto the spindle is also a really tight fit After trying to get it into its space in the spindle, I left it in the freezer overnight to make it shrink a little bit for a better fit, but having to use a tweezer to handle it, I lost it on the floor and it (has so far) disappeared. I cut out a coarce piece of some 5mm aluminium I had and it seems to do the job so far.
The most important observation: I bought the saw used with a broken drawbolt, so the first thing I did was to change it, afterwards, I was always annoied over how difficult it was to adjust the height. After lubricating the moveable parts in the height adjustment system, it runs very smoothly and easily. Next time it starts to go harder again, I will hopefully remember to rinse and lubricate it before the drawbolt is damaged…
You must be logged in to post a comment.