Enhver hage med respekt for seg selv bør ha en festival fra tid til annen- og da trenges det en scene.
Vår scene blir bygget hovedsaklig av 2″x6″,det er mulig det kunne holdt med 2″x4″, men det var nå en gang 2″x6″ jeg hadde liggende første gangen vi skulle bygge scene. Scenen har en grunnflate på ca 5×4 meter (breddexdybde) og en høyde på ca 2.5 meter (må kunne gjøre en “hoppestopp”) På grunn av fasongen på plenen der den blir bygget, er den litt dypere på den ene siden enn på den andre.
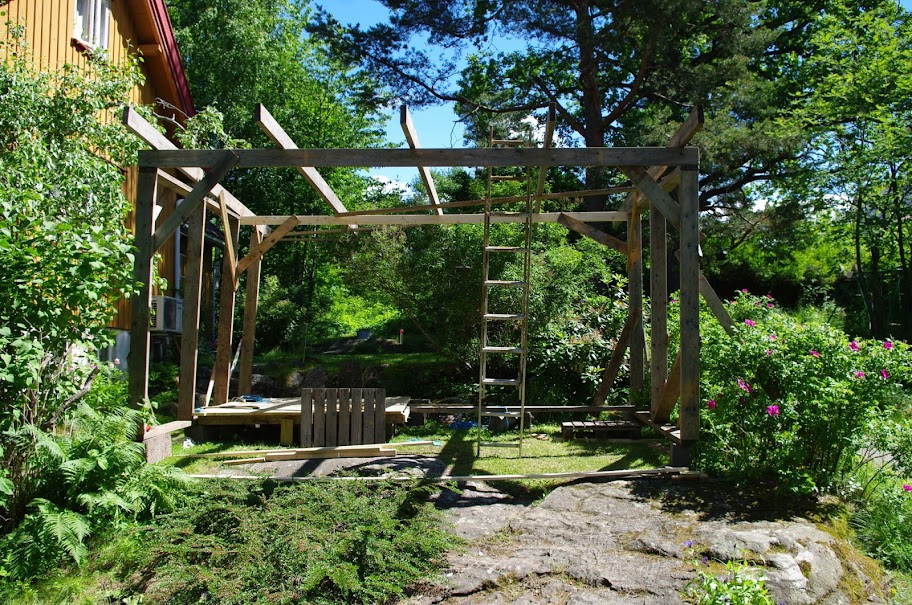
Vi bygger først de to siderammene, deretter settes de opp med støtter i underkant, slik at bærebjelkene for taket kan legges opp.

I bakkant ble det bygget et trommepodium på ca 2×2 meter, for å sikre at dette ble stabilt, la vi bærebjelker relativt tett (ca 40 cm avstand)

Vi la opp en stående 2″x6″ i forkant for å bære taket. I bakkant la vi på en 2″x4″ i høyde med rammen, dermed ble det et fall på ca 15 cm over ca 2.5 meter. Stående 2″x6″ ble lagt i lengderetningen. Dette fallet ser bra ut, men det er litt lite for å få regnvann til å renne unna. Det er viktig å bruke en god presenning som kan strammes godt opp til tak dersom det er fare for nedbør. Det er også satt opp en bjelke bakerst på venstre side som ikke skal bære noe, men som definerer bakre hjørne på scenen.
Vi brukte to presenninger for å lage vegger. Den ene var bakvegg og høyre side (sett forfra) den andre var venstre side og overlappet et par meter på bakveggen. Ved å ikke feste bakveggen for mye i enden, ble det mulig å komme inn på scenen bakfra. En bagasjestropp rundt en av bjelkene ble brukt for å feste bakveggen og samtidig gjøre det mulig å åpne.

Tverrliggerene her er, sett forfra:
2″x4″ (ny) som bærer taket i bakkant.
Skrå lekt som er feste for bakveggen .
Rett lekt som er feste for avslutingen av venstre vegg.
Med presenninger på plass. Skrålekten holder bakveggen

Noen paller ble brukt som underlag for forsterkerene

En lekt festet i forkant blir feste for takpresenningen.

Taket må strammes godt opp i bakkant:

Klar for soundcheck:

og konsert:

Neste gang scenen settes opp, vil vi montere belysningen i fremkant av scenen.


You must be logged in to post a comment.